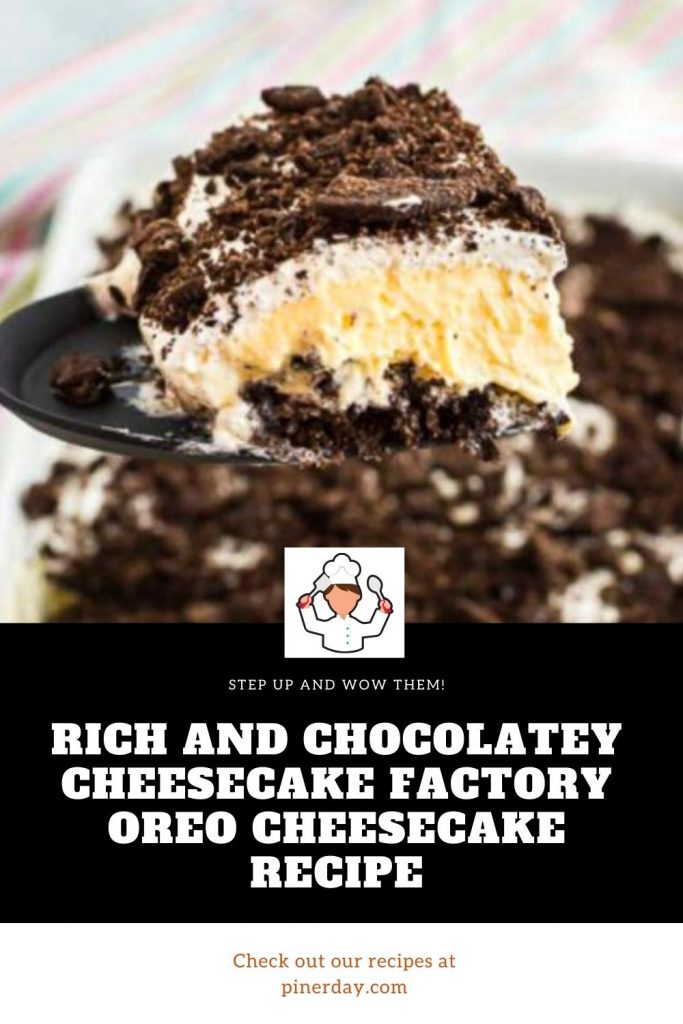
I have never met a cheesecake I didn’t like. This Cheesecake Factory Oreo Cheesecake takes the prize. My two favorite foods, cheesecake and Oreo’s combining to make the best dessert of all time: Oreo Cheesecake. You have to try this recipe.
Your tastebuds haven’t experienced true euphoria until they taste this cheesecake.
The crunchy Oreo with the creamy cheesecake, come together so nicely that you won’t ever taste cheesecake the same again.
If you have never been to Cheesecake Factory to try this, no worries, because this recipe is spot on, and you can enjoy it in the comforts of your own home.
It also costs less to make to whole cheesecake, than one piece of cheesecake from the Cheesecake Factory, so I also consider that a win.
This is the perfect dessert to feed a crowd. You don’t need much to get you full. It is extremely rich, and full of chocolatey flavor. You are going to love this one.

TIPS ON MAKING CHEESECAKE FACTORY OREO CHEESECAKE
You will most definitely want a hand mixer, or standing mixer for this recipe.There are a lot of thick ingredients, and it will be difficult to fully combine them all, without some type of electric mixer.However, be sure not to over-mix the cheesecake mixture. When you see that the ingredients have become fully combined, turn of the mixer, to avoid over stirring your batter, which could create issues when it bakes.
To crush your Oreos for your crust, it all depends on how you like it. I prefer larger Oreo chunks in my crust, so I crush my Oreos with a hammer in a thick ziplock bag.If you prefer your crust to be more fine, you could use a blender or food processor to crush up the Oreo’s.
Be sure your ingredients are at room temperature when cooking cheesecake. This will help the mixture be more smooth. Nobody wants a cheesecake with cream cheese chunks in it.It will also create a better texture, after cooking.
COULD I MAKE THIS CHEESECAKE WITHOUT A SPRINGFORM PAN?
You could most definitely make this cheesecake without a springform pan. I have made mini Oreo Cheesecakes using this recipe, and they were delicious.
I used a muffin tin to make them. I heavily sprayed each insert with non-stick cooking spray to insure there was no sticking.
I have never tried making it in a glass pan, but it is possible. I would recommend using a 13×9″ pan or cutting the recipe down 1/3 and using a 9×9 inch pan.
Cheesecake Factory Oreo Cheesecake
Ingredients:
Crust :
- 2 cups crushed Oreos. (Frosting included)
- 6 Tablespoons butter, melted, plus more for the pan
Fіllіng:
- 3 (8 ounce) packages cream cheese (softened to room temperature)
- 1 cup sugar
- 5 large eggs (at room temperature)
- 2 1/2 teaspoons vanilla extract
- 1/2 teaspoon salt
- 1/4 cup all-purpose flour
- 1 (8 ounce) container sour cream (room temp)
- 4 Tablespoons butter (melted)
- 8 Oreo cookies (for the batter)
- 10 Oreo cookies (for top of cheesecake)
Directions:
Crust:
- Combine the melted butter with Oreo crumbs and press in a 9-inch spring pan and 1 1/2″ up the sides. Set crust aside. Be sure to leave in Oreo filling when crushing the Oreos.
Filling:
- Preheat oven to 325 degrees. Beat cream cheese until smooth and fluffy. Add the ½ stick of melted butter.
- Continue mixing and add sugar slowly, making sure it is a smooth batter.
- Add the eggs one at a time.
- Add the vanilla, salt, flour and cream cheese mixture in the bowl and continue beating until it is smooth without any lumps.
- Add the sour cream and continue to beat. Stop mixing and add your crushed Oreos to the batter.
- Pour the batter into the pan with the Oreo crust.
- Place your other crushed Oreos on top for garnish.
- Place in oven and bake for one hour or until the middle does not jiggle.
- When it is finished cooking, keep the cheesecake in the oven but turn the oven off.
- Prop open the oven door, and let it cool for 1 hour.
- Place it in the fridge for at least 4 hours, but 24 hours is preferred.
- Top with whipped cream when ready to serve.


Rich and Chocolatey Cheesecake Factory Oreo Cheesecake Recipe
Ingredients
Crust :
- 2 cups crushed Oreos. (Frosting included)
- 6 Tablespoons butter, melted, plus more for the pan
Fіllіng:
- 3 (8 ounce) packages cream cheese (softened to room temperature)
- 1 cup sugar
- 5 large eggs (at room temperature)
- 2 1/2 teaspoons vanilla extract
- 1/2 teaspoon salt
- 1/4 cup all-purpose flour
- 1 (8 ounce) container sour cream (room temp)
- 4 Tablespoons butter (melted)
- 8 Oreo cookies (for the batter)
- 10 Oreo cookies (for top of cheesecake)
Instructions
Crust:
- Combine the melted butter with Oreo crumbs and press in a 9-inch spring pan and 1 1/2″ up the sides. Set crust aside. Be sure to leave in Oreo filling when crushing the Oreos.
Filling:
- Preheat oven to 325 degrees. Beat cream cheese until smooth and fluffy. Add the ½ stick of melted butter.
- Continue mixing and add sugar slowly, making sure it is a smooth batter.
- Add the eggs one at a time.
- Add the vanilla, salt, flour and cream cheese mixture in the bowl and continue beating until it is smooth without any lumps.
- Add the sour cream and continue to beat. Stop mixing and add your crushed Oreos to the batter.
- Pour the batter into the pan with the Oreo crust.
- Place your other crushed Oreos on top for garnish.
- Place in oven and bake for one hour or until the middle does not jiggle.
- When it is finished cooking, keep the cheesecake in the oven but turn the oven off.
- Prop open the oven door, and let it cool for 1 hour.
- Place it in the fridge for at least 4 hours, but 24 hours is preferred.
- Top with whipped cream when ready to serve.


