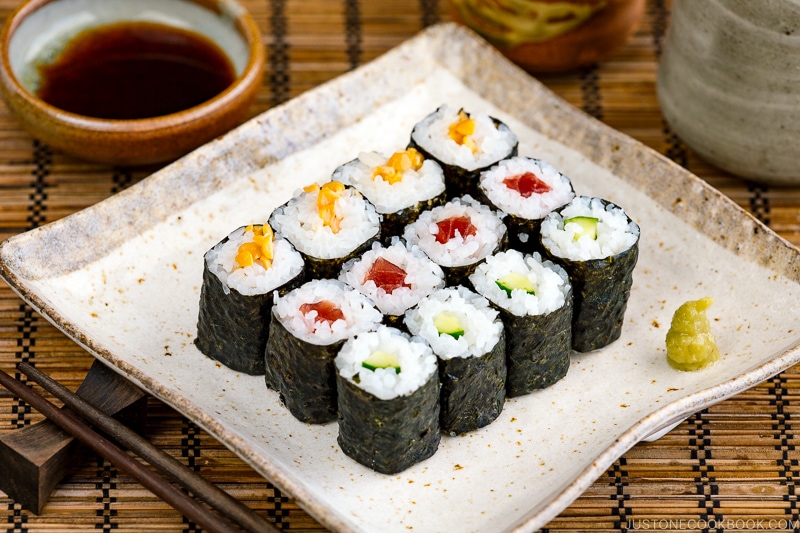
Sushi rolls, those bite-sized bundles of flavor, have captured hearts (and stomachs) worldwide. But what if you could recreate that authentic Japanese sushi experience in your own kitchen? This comprehensive guide will walk you through every step of making delicious and visually stunning sushi rolls, even if you’re a complete beginner. We’ll demystify the process, from preparing the perfect sushi rice to mastering the rolling technique. Get ready to impress your friends and family with your newfound sushi-making skills!


Sushi rolls, also known as makizushi, are a staple of Japanese cuisine, celebrated for their balanced flavors, aesthetic appeal, and versatility. The art of making sushi is a delicate balance of precision and creativity. While it may seem intimidating at first, with a little practice and the right guidance, anyone can create delicious and impressive sushi rolls at home. This recipe focuses on classic techniques and easily accessible ingredients, making the journey into sushi making both enjoyable and rewarding. You will find this guide easy to follow, it simplifies all the process in a way that anyone can understand.
Recipe Overview
| Category | Value |
|---|---|
| Preparation Time | 45 minutes |
| Cooking Time | 25 minutes |
| Servings | 4-6 rolls (approximately 24-36 pieces) |
| Difficulty | Medium |
Nutrition Per Serving (Approximate)
(Based on a serving of 6 pieces of a mixed sushi roll with tuna, avocado, and cucumber)
| Nutrient | Amount |
|---|---|
| Calories | 350-450 kcal |
| Protein | 15-20g |
| Fat | 10-15g |
| Carbohydrates | 50-60g |
Ingredients
| Ingredient | Quantity | Notes |
|---|---|---|
| Sushi Rice | 2 cups (uncooked) | Short-grain Japanese rice is essential. |
| Water | 2 1/4 cups | For cooking the rice. |
| Rice Vinegar | 1/4 cup | Seasoned or unseasoned. If unseasoned, add 2 tbsp sugar and 1 tsp salt. |
| Sugar | 2 tablespoons | Adjust to taste. |
| Salt | 1 teaspoon | Adjust to taste. |
| Nori Sheets | 5-6 sheets | Dried seaweed sheets. |
| Fillings (choose your favorites) | Varies | Options: Cucumber, avocado, tuna (sashimi-grade), salmon (sashimi-grade), crab sticks, cooked shrimp, carrots, cream cheese. |
| Wasabi | To taste | Japanese horseradish paste. |
| Soy Sauce | For serving | Japanese soy sauce is preferred. |
| Pickled Ginger (Gari) | For serving | To cleanse the palate between bites. |
| Bamboo Rolling Mat (Makisu) | 1 | Essential for shaping the rolls. Wrap in plastic wrap. |
| Plastic Wrap | As needed | To cover the bamboo mat. |
Cooking Instructions
- Prepare the Sushi Rice: Rinse the sushi rice under cold water until the water runs clear (about 3-4 times). This removes excess starch and prevents the rice from becoming too sticky.
- Cook the Rice: Place the rinsed rice and water in a saucepan. Bring to a boil over medium-high heat, then reduce the heat to low, cover, and simmer for 18-20 minutes, or until all the water is absorbed. Do not lift the lid during cooking.
- Season the Rice: While the rice is cooking, prepare the sushi vinegar. In a small saucepan, combine the rice vinegar, sugar, and salt. Heat over low heat, stirring until the sugar and salt are dissolved. Do not boil.
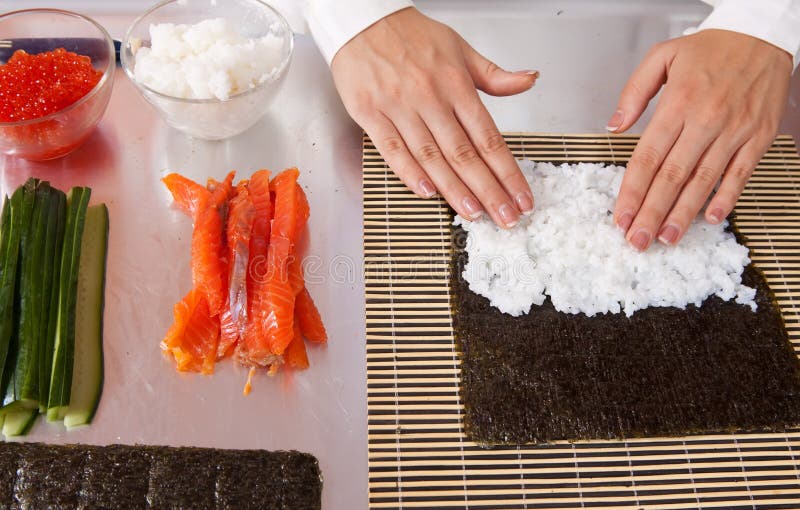
- Cool and Mix the Rice: Once the rice is cooked, remove it from the heat and let it sit, covered, for 10 minutes. Transfer the rice to a large wooden bowl (hangiri is ideal, but any large bowl will work). Gently drizzle the sushi vinegar mixture over the rice, using a rice paddle or spatula to gently fold the vinegar into the rice. Be careful not to mash the rice. Fan the rice while mixing to help it cool quickly and evenly. The rice should be slightly sticky but not mushy.
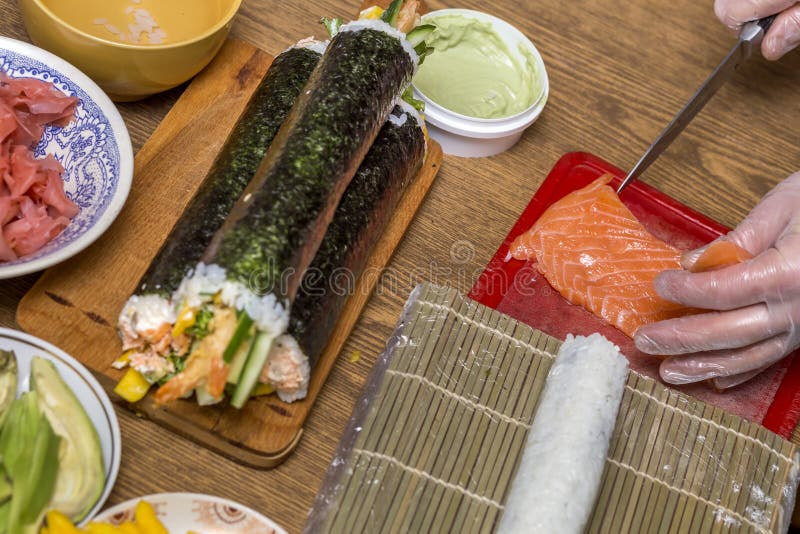
- Prepare the Fillings: Cut your chosen fillings into thin strips or small pieces. For example, slice cucumbers and carrots into julienne strips, and cut avocado into thin wedges. If using tuna or salmon, ensure it’s sashimi-grade and sliced thinly.
- Set Up Your Rolling Station: Cover the bamboo rolling mat with plastic wrap to prevent the rice from sticking. Have a small bowl of water nearby to keep your fingers moist, which will also prevent the rice from sticking to your hands.
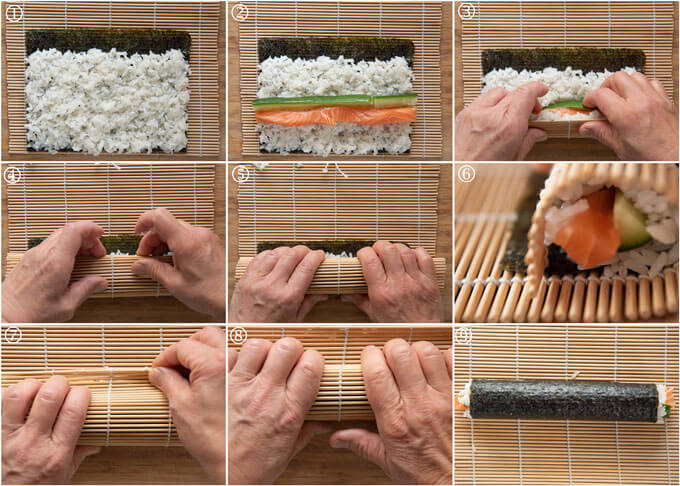
- Assemble the Sushi Roll: Place a nori sheet on the bamboo mat, shiny side down. Spread a thin, even layer of sushi rice over the nori sheet, leaving about 1 inch of space at the top edge of the nori. Moisten your fingers with water to prevent the rice from sticking.
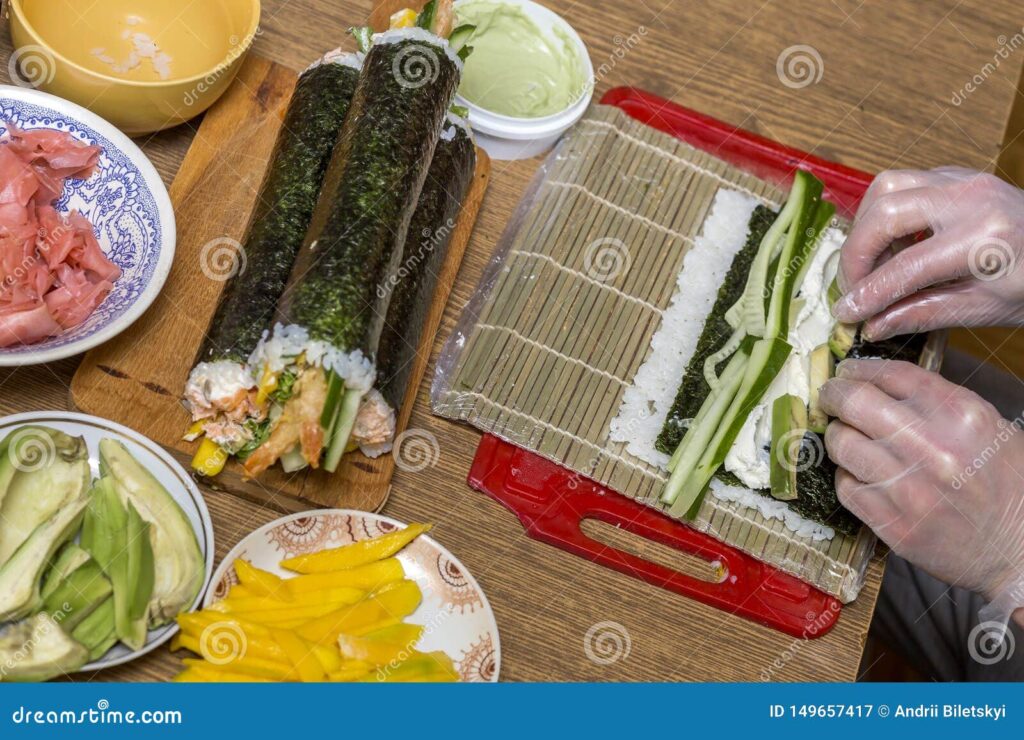
- Add the Fillings: Arrange your chosen fillings horizontally across the center of the rice. Don’t overfill the roll, as this will make it difficult to roll tightly.
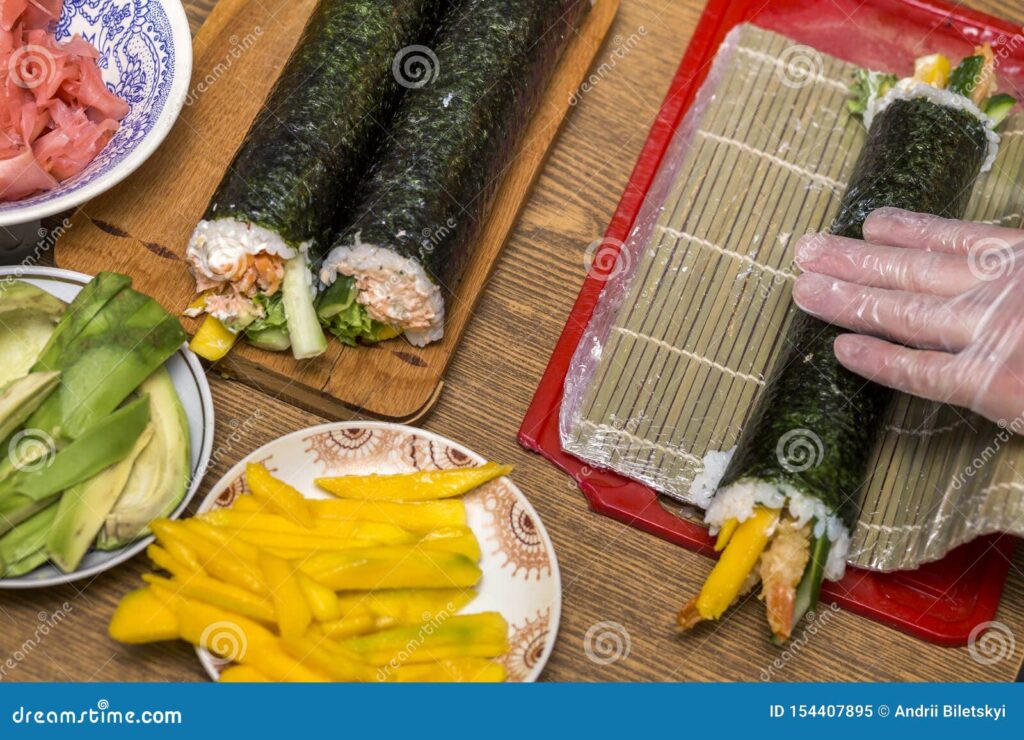
- Roll the Sushi: Lift the edge of the bamboo mat closest to you and carefully roll the nori sheet over the fillings, tucking the edge of the nori under the fillings. Continue rolling tightly, using the bamboo mat to shape the roll. Once the roll is complete, firmly press the bamboo mat around the roll to seal it and give it a uniform shape.
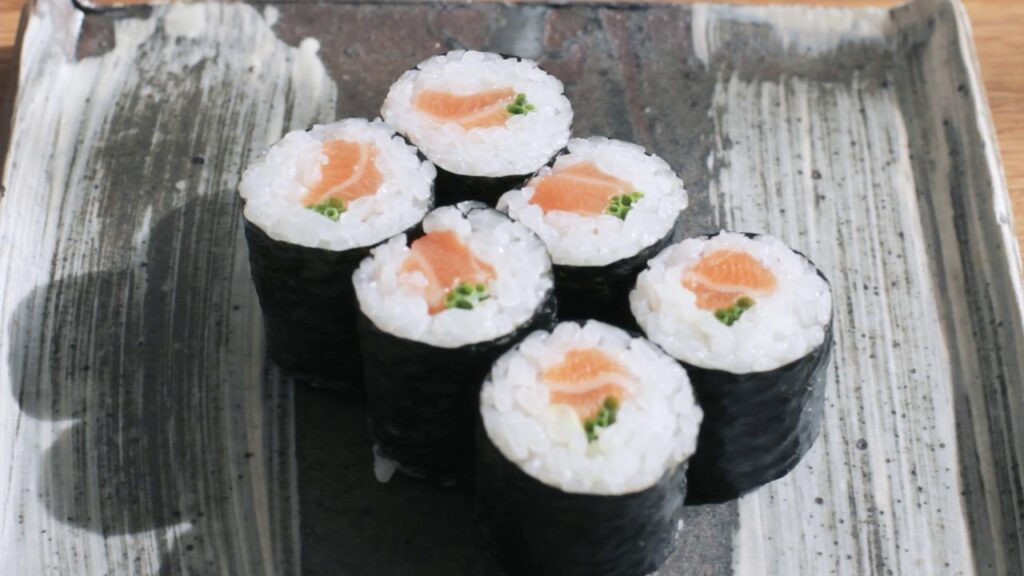
- Slice the Sushi: Using a sharp, moistened knife, slice the sushi roll into 6-8 equal pieces. Wipe the knife clean between each slice to prevent the rice from sticking.
- Repeat: Repeat steps 7-10 with the remaining nori sheets and fillings.
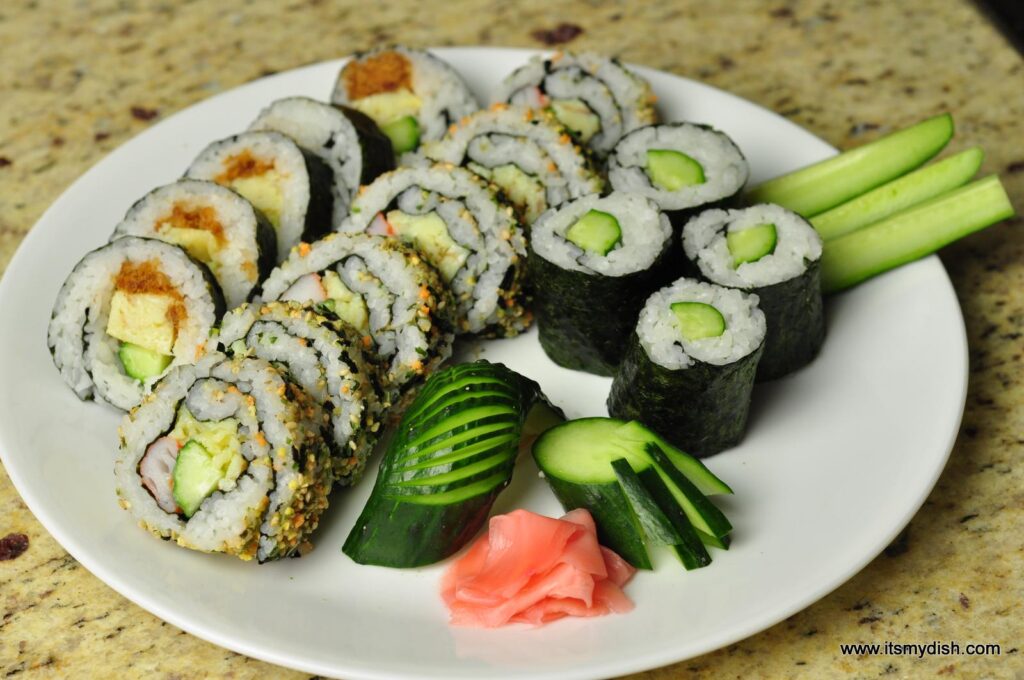
- Serve: Arrange the sushi rolls on a plate and serve with soy sauce, wasabi, and pickled ginger.
Serving Suggestions
Serve your freshly made sushi rolls immediately for the best taste and texture. Here are a few serving suggestions:
- Classic Presentation: Arrange the sushi rolls neatly on a plate, garnished with a sprig of parsley or a thin slice of lemon.
- Dipping Sauces: Offer a variety of dipping sauces, such as regular soy sauce, low-sodium soy sauce, or tamari (gluten-free soy sauce).
- Accompaniments: Serve with a side of edamame (steamed soybeans), miso soup, or a Japanese salad for a complete meal.
- Creative Plating: Create a visually appealing platter with different types of sushi rolls, arranged in a colorful and artistic manner.
Making authentic Japanese sushi rolls is a rewarding culinary experience that allows you to explore the flavors and artistry of Japanese cuisine. While the process may seem intricate at first, with practice and attention to detail, you can create sushi rolls that rival those served in your favorite Japanese restaurant.

Experiment with different fillings and flavor combinations to create your own signature sushi rolls. Don’t be afraid to try new things and have fun with the process. The key to successful sushi making is to be patient, precise, and passionate about creating delicious and beautiful food.
Important Considerations:
- Rice Quality: Using high-quality sushi rice is crucial for achieving the right texture and flavor. Look for short-grain Japanese rice specifically labeled as sushi rice.
- Freshness of Ingredients: If using raw fish, ensure it’s sashimi-grade and sourced from a reputable supplier. Freshness is paramount for both taste and safety.
- Knife Sharpness: A sharp knife is essential for clean slices. Dull knives can tear the sushi and make it difficult to create neat pieces.
Tips and Notes for Perfect Sushi Rolls
Mastering the art of sushi-making takes practice, but these tips will help you on your way to creating restaurant-quality sushi at home:
- Rice Consistency is Key: The most important element of good sushi is perfectly cooked and seasoned rice. Ensure the rice is neither too mushy nor too hard.
- Don’t Overfill: Resist the urge to pack your sushi rolls with too many fillings. Overfilling makes the rolling process difficult and can lead to messy results.
- Moisten Your Hands: Keep a bowl of water nearby and frequently moisten your hands to prevent the rice from sticking to your fingers.
- Use a Sharp Knife: A sharp knife is crucial for clean cuts. A dull knife will tear the nori and rice, resulting in a messy presentation. Wet the knife before each cut to prevent sticking.
- Seal the Roll Properly: When rolling, ensure the end of the nori sheet is tucked tightly under the roll to create a secure seal.
- Practice Makes Perfect: Don’t be discouraged if your first few attempts aren’t perfect. With practice, you’ll develop the necessary skills and techniques.
- Alternative Fillings: Feel free to experiment with a wide variety of fillings to create your own unique sushi rolls. Consider adding pickled radish (daikon), cooked shiitake mushrooms, or tempura flakes for added flavor and texture.
- Vegetarian Options: Sushi can easily be made vegetarian or vegan. Common vegetarian fillings include avocado, cucumber, carrot, bell pepper, and marinated tofu.
- Make Ahead: Sushi rolls are best enjoyed fresh, but they can be made a few hours in advance and stored in the refrigerator. Cover the rolls tightly with plastic wrap to prevent them from drying out.
- Customize the Seasoning: Adjust the amount of sugar and salt in the sushi vinegar to suit your personal taste preferences.
Enjoy the process of creating these delicious and beautiful Authentic Japanese sushi rolls! By following these steps, you’ll be able to produce restaurant-quality sushi, impressing friends and family with your newfound sushi-making expertise. Remember, the key is to practice and enjoy the process. Happy rolling!