
Dive into the world of Japanese cuisine with this incredibly flavorful and easy-to-make Tuna Okonomiyaki recipe! Okonomiyaki, often described as a savory pancake, is a versatile dish that allows for endless customization. Our version features the rich, umami flavor of tuna, combined with the classic okonomiyaki ingredients to create a satisfying and delightful meal. Whether you’re a seasoned cook or a beginner in the kitchen, this recipe is designed to be straightforward and enjoyable. Get ready to experience a taste of Japan right in your own home with this hearty and delicious Tuna Okonomiyaki!

This Tuna Okonomiyaki recipe is perfect for a quick lunch, a satisfying dinner, or even a fun weekend project. The combination of textures and flavors, from the crispy edges to the savory filling, makes each bite a delightful experience. The addition of tuna not only adds a protein boost but also introduces a unique and delicious element to the traditional okonomiyaki recipe. So, gather your ingredients and let’s get started on this culinary adventure!
Recipe Overview
Before we dive into the details, here’s a quick overview of what you’ll need and what to expect:
| Category | Value |
|---|---|
| Preparation Time | 20 minutes |
| Cooking Time | 25 minutes |
| Servings | 2 servings |
| Difficulty | Easy |
Nutrition per Serving (Approximate)
This is an estimated value and can vary depending on the specific ingredients used.

| Nutrient | Amount |
|---|---|
| Calories | 450-550 kcal |
| Protein | 30-40g |
| Fat | 20-30g |
| Carbohydrates | 30-40g |
Ingredients
Here’s everything you’ll need to make this delicious Tuna Okonomiyaki:
| Ingredient | Quantity |
|---|---|
| All-Purpose Flour | 1 cup |
| Water or Dashi (Japanese soup stock) | 3/4 cup |
| Egg | 1 large |
| Canned Tuna (in water or oil, drained) | 1 (5 ounce) can |
| Shredded Cabbage | 2 cups |
| Green Onions, chopped | 2-3 stalks |
| Pickled Ginger (beni shoga), chopped (optional) | 1 tablespoon |
| Vegetable Oil | For cooking |
| Okonomiyaki Sauce | To taste |
| Japanese Mayonnaise (Kewpie) | To taste |
| Aonori (dried green seaweed flakes) | To taste |
| Katsuobushi (dried bonito flakes) | To taste |
Cooking Instructions
- Prepare the Batter: In a large bowl, whisk together the all-purpose flour and water (or dashi) until smooth. Ensure there are no lumps.
- Add the Egg: Crack the egg into the batter and whisk until well combined. This will help bind the ingredients together.
- Incorporate the Tuna: Drain the canned tuna thoroughly and flake it with a fork. Add the flaked tuna to the batter and mix gently.
- Add Vegetables: Add the shredded cabbage, chopped green onions, and pickled ginger (if using) to the bowl. Mix everything together until the vegetables are evenly distributed throughout the batter. Don’t overmix.
- Heat the Pan: Heat a large skillet or griddle over medium heat. Add a tablespoon of vegetable oil and make sure the entire surface is coated evenly.
- Pour the Batter: Once the pan is hot, pour half of the batter onto the skillet, spreading it out into a circle about 8 inches in diameter. For smaller, individual okonomiyaki, use a smaller amount of batter.
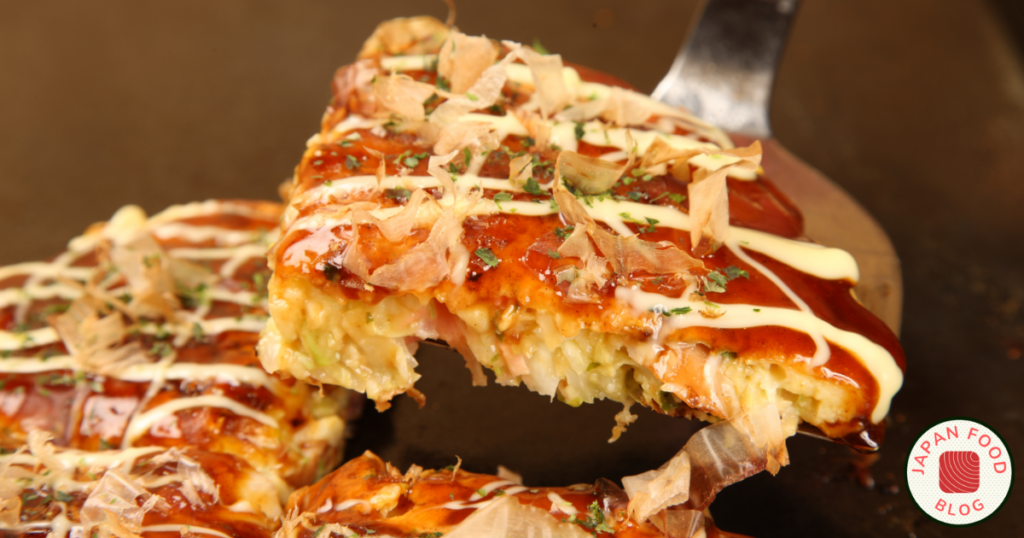
- Cook the First Side: Cook the Tuna Okonomiyaki for about 5-7 minutes, or until the bottom is golden brown and crispy. Use a spatula to gently lift the edge to check the color.
- Flip Carefully: Using a wide spatula (or two if needed), carefully flip the okonomiyaki. Be gentle to avoid breaking it apart.
- Cook the Second Side: Cook the other side for another 5-7 minutes, or until it is also golden brown and cooked through. The internal temperature should reach 165°F (74°C).
- Repeat for the Second Okonomiyaki: Repeat steps 6-9 with the remaining batter to make the second Tuna Okonomiyaki. Add more oil to the pan as needed.
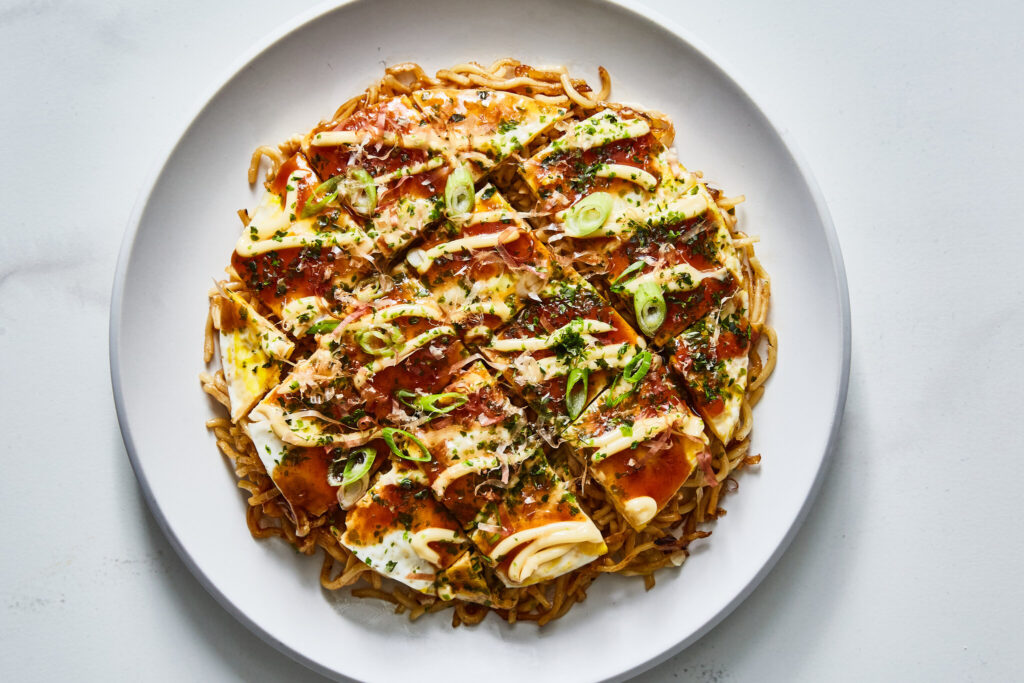
- Serve Hot: Transfer the cooked Tuna Okonomiyaki to a plate and let it rest for a minute or two before adding toppings.
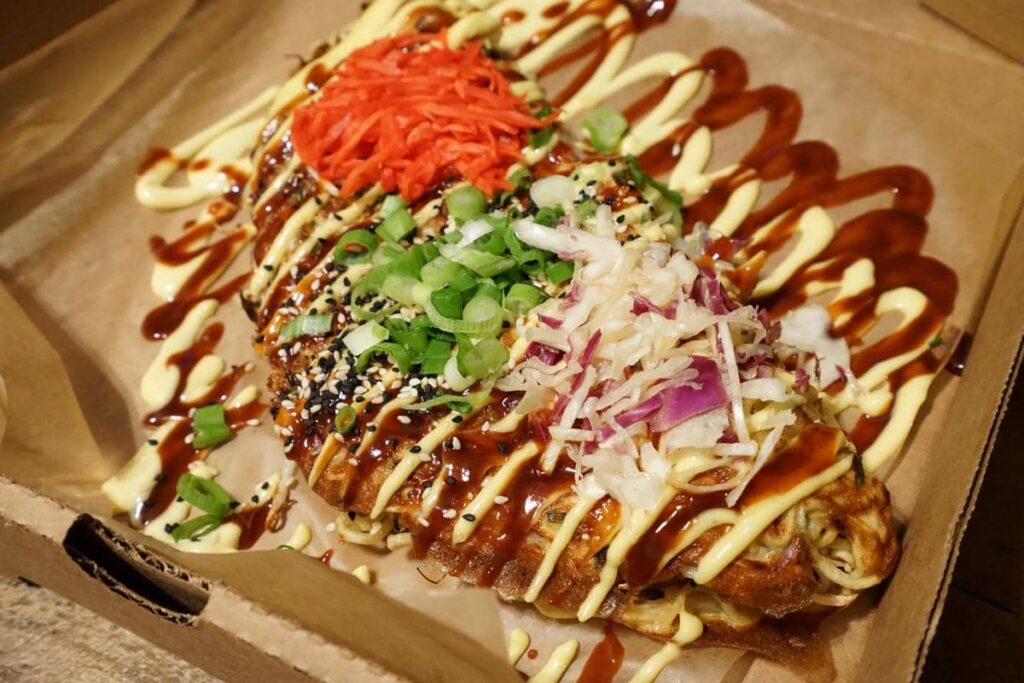
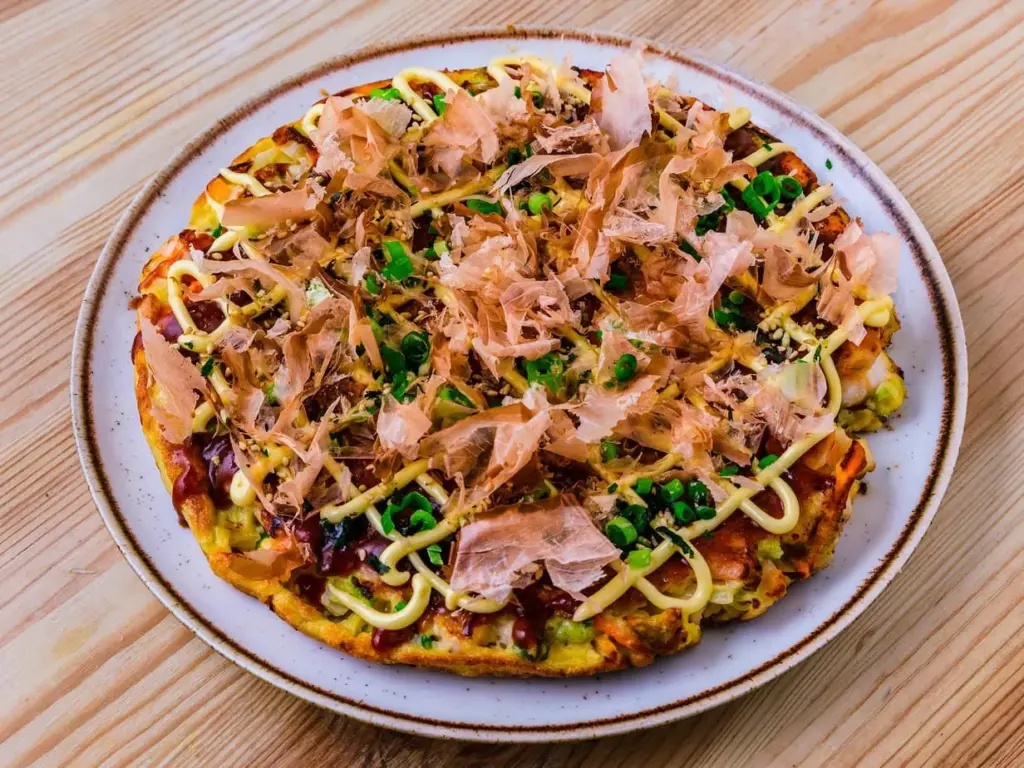
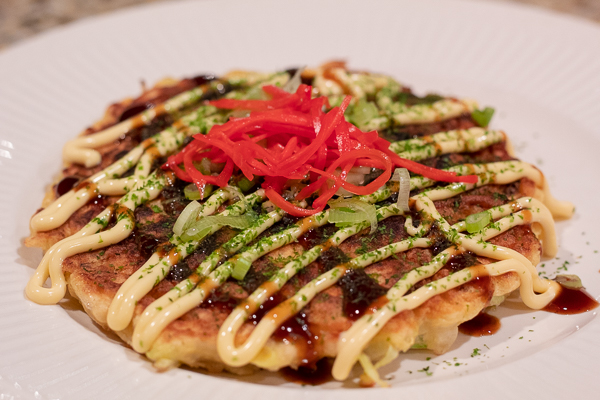
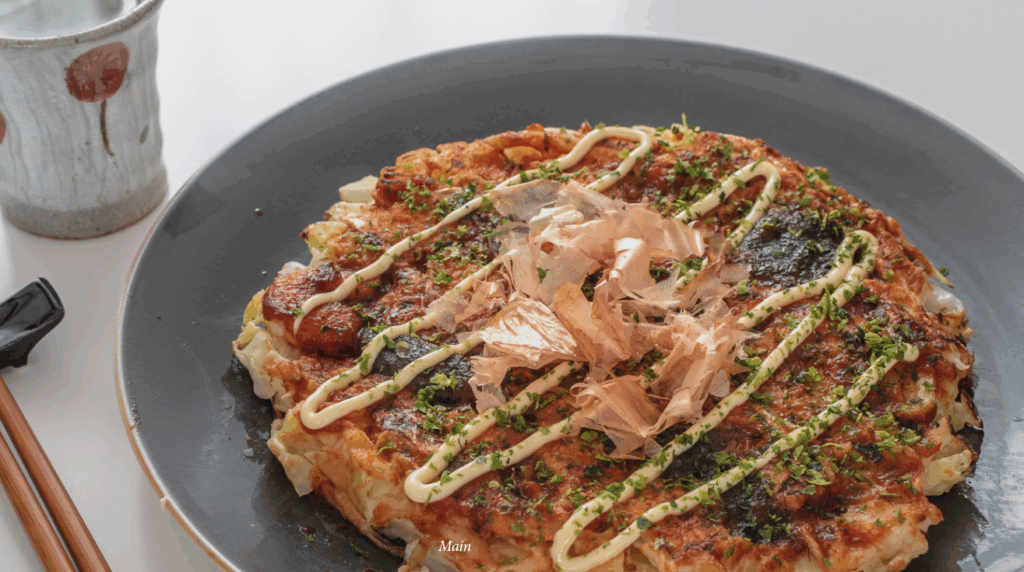
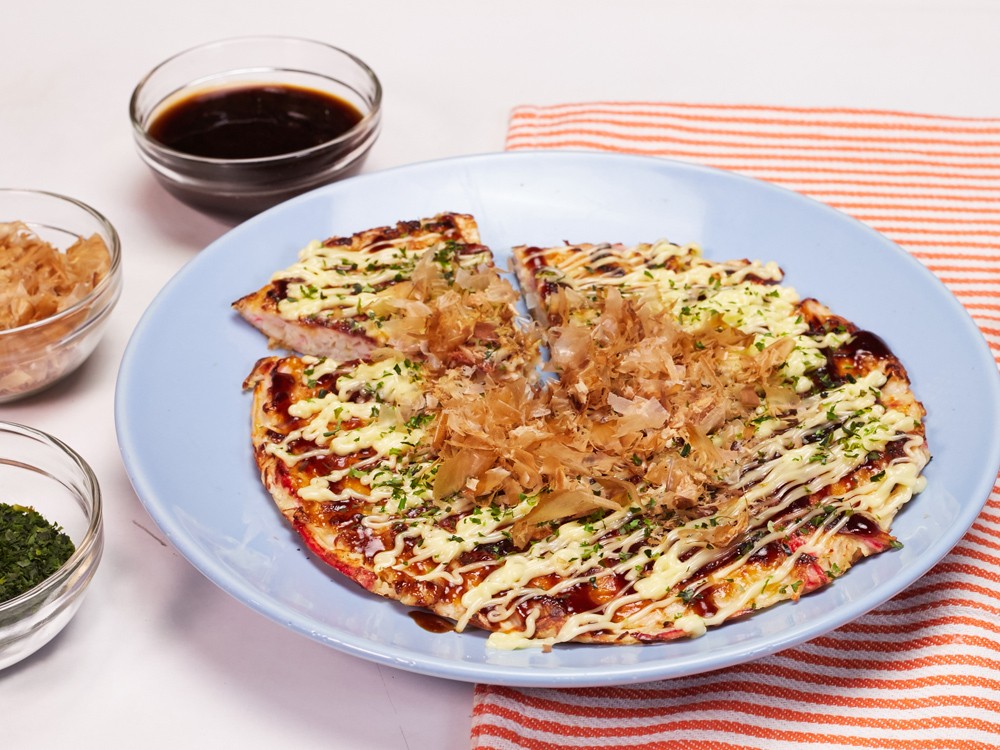
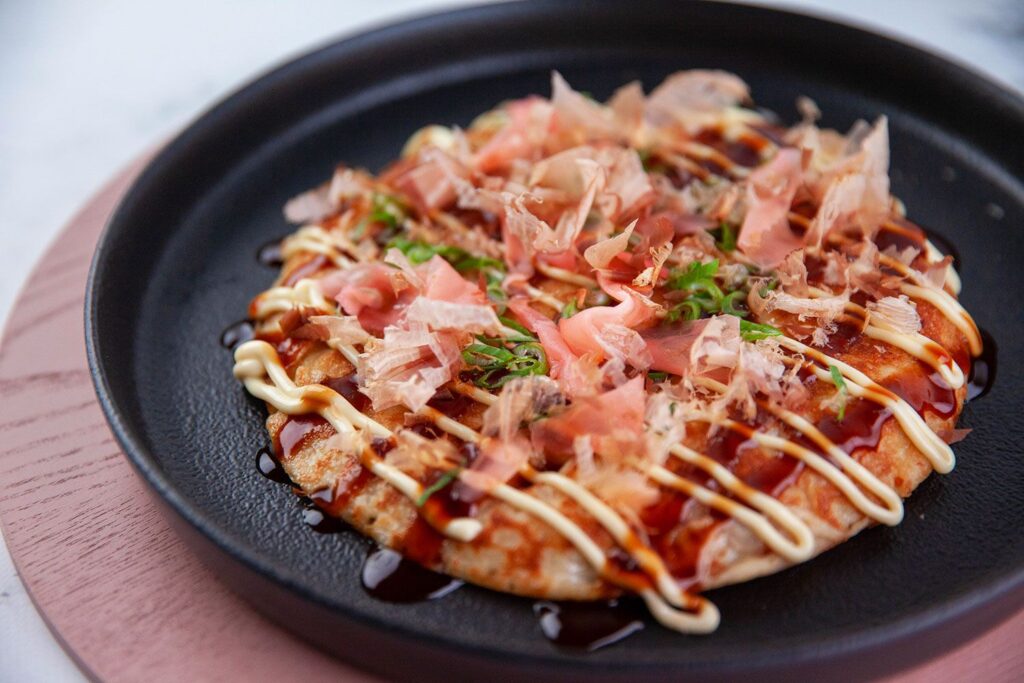
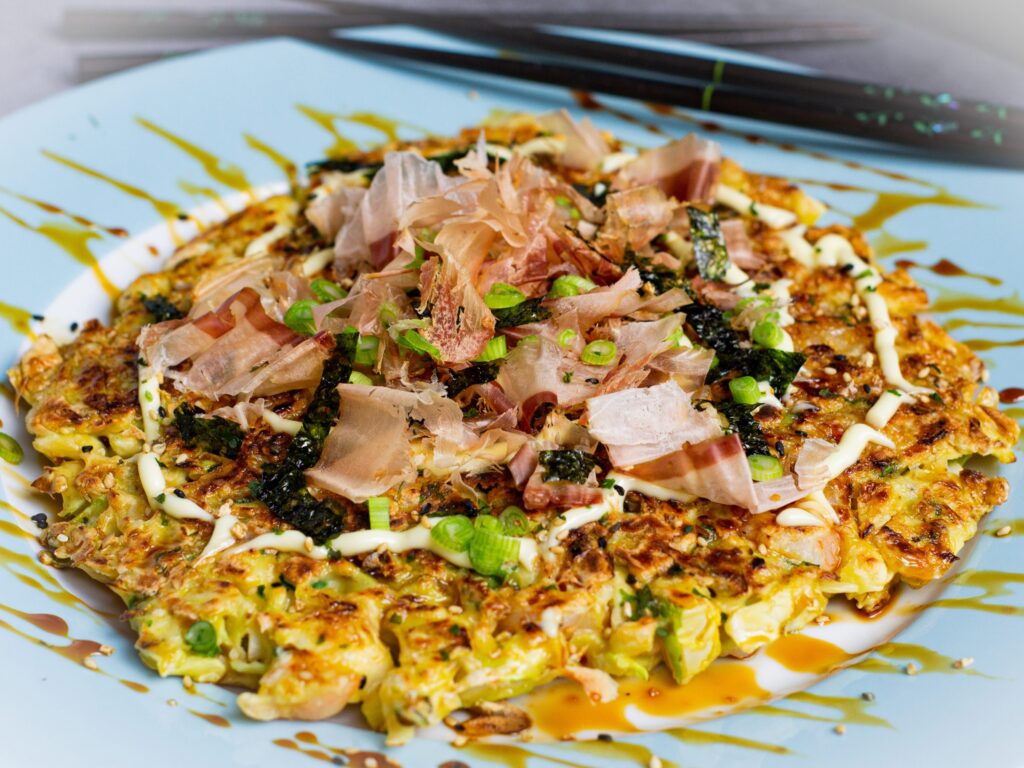
- Add Toppings: Generously drizzle Okonomiyaki sauce over the top of each pancake. Then, add Japanese mayonnaise in a zig-zag pattern.
- Garnish: Sprinkle aonori (dried green seaweed flakes) and katsuobushi (dried bonito flakes) over the top. The katsuobushi will dance and wave due to the heat, adding a fun visual element.
Serving Suggestions
This Tuna Okonomiyaki is delicious on its own, but here are a few ideas to enhance your dining experience:
- Serve with a side of pickled ginger for a refreshing palate cleanser.
- Pair it with a simple green salad dressed with a light vinaigrette.
- Offer a bowl of miso soup to complete the Japanese meal.
- Add a sprinkle of sesame seeds for extra flavor and texture.
This Tuna Okonomiyaki recipe is a fantastic way to enjoy a taste of Japan. The savory flavors, combined with the customizable toppings, make it a meal that everyone will love. Don’t be afraid to experiment with different ingredients and find your perfect combination. The beauty of okonomiyaki is that it’s all about personal preference!

Tips and Notes for Perfect Tuna Okonomiyaki
Here are some helpful tips to ensure your Tuna Okonomiyaki turns out perfect every time:
- Use Quality Tuna: Opt for good-quality canned tuna, either in water or oil, depending on your preference. Make sure to drain it well to avoid a soggy batter.
- Don’t Overmix the Batter: Overmixing can lead to a tough okonomiyaki. Mix until just combined.
- Hot Pan is Key: Ensure your skillet or griddle is hot before pouring the batter. This will help create a crispy crust.
- Adjust the Heat: If the okonomiyaki is browning too quickly, lower the heat to medium-low.
- Be Patient: Allow the okonomiyaki to cook thoroughly on each side before flipping. This will prevent it from falling apart.
- Customize the Toppings: Feel free to add other toppings such as bonito flakes, a sprinkle of sesame seeds, or even a drizzle of sriracha mayo for a spicy kick.
- Dashi for Extra Flavor: Using dashi (Japanese soup stock) instead of water will add a deeper, more umami flavor to your okonomiyaki.
- Add More Vegetables: Experiment with other vegetables like bean sprouts, carrots, or mushrooms.
Enjoy this delightful Tuna Okonomiyaki recipe! It’s a simple and satisfying way to bring the flavors of Japan into your kitchen. This Tuna Okonomiyaki is sure to impress with its unique taste and texture. Happy cooking!
The combination of tuna and the classic okonomiyaki ingredients creates a dish that is both comforting and exciting. This Tuna Okonomiyaki recipe is a testament to the versatility of Japanese cuisine. Enjoy!
The crispy edges and savory filling of this Tuna Okonomiyaki make it a truly irresistible dish. This is a recipe that you will want to make again and again. Enjoy making this Tuna Okonomiyaki, it’s easier than you think.
Don’t hesitate to experiment with this Tuna Okonomiyaki recipe and make it your own. The possibilities are endless! This Tuna Okonomiyaki recipe is truly the perfect dish to enjoy with family and friends!

Remember, the key to a great okonomiyaki, especially this Tuna Okonomiyaki version, is fresh ingredients and a little bit of patience. With these tips, you’ll be enjoying delicious, homemade Tuna Okonomiyaki in no time!
Enjoy your homemade Tuna Okonomiyaki!


